Bird Feeder Designs with Functional Features That Will Stand Out

Bird Feeder Designs with Functional Features That Will Stand Out

Bird Feeder Designs with Functional Features That Will Stand Out

Beyond the simple act of providing food, bird feeders can transform your backyard into a vibrant avian sanctuary. But with countless designs available, how do you choose a feeder that's both functional and visually captivating? This article delves into the world of bird feeder design, showcasing functional features that will elevate your feeder from ordinary to extraordinary.

Beyond Aesthetics: Functionality First

A stunning bird feeder that fails to meet basic needs is a waste of space and resources. Prioritize functionality in your design, ensuring your feeder attracts birds and protects the food from elements and unwanted visitors. Here are some key functional aspects to consider:

Weather Resistance

Exposure to rain, snow, and sun can quickly ruin bird food. Choose materials that resist these elements. Metal, treated wood, and durable plastics are excellent choices. A sloped roof and strategically placed drainage holes can further protect the food.

Pest Control

Squirrels and other pesky critters can quickly deplete your bird food supply. Incorporate features that deter these unwanted guests. This could include:

  • Squirrel-proof feeders with cages or baffles.
  • Using hot pepper-based bird food.
  • Installing motion-activated sprinklers or deterrents.

Easy Cleaning and Refilling

Bird feeders require regular cleaning and refilling. Design your feeder with ease of access in mind. Choose a feeder with a removable tray or a top-loading design. These features make maintenance a breeze, keeping your feeder clean and healthy.

Unique and Eye-Catching Designs

Now that you've addressed functionality, it's time to inject some creativity and style. A unique design will make your feeder a focal point in your yard, attracting both birds and attention.

Natural Materials and Textures

Embrace the natural world by incorporating materials like reclaimed wood, woven vines, or repurposed branches. These elements not only add visual interest but also blend seamlessly into the surrounding environment.

Geometric Shapes and Patterns

Break away from traditional feeder designs and embrace geometry. Think triangles, hexagons, or even intricate patterns carved into the wood. These abstract shapes add a modern flair to your feeder.

Interactive Elements

Elevate your feeder design with interactive elements. A small birdbath integrated into the feeder creates a welcoming oasis. You can also incorporate perches, swings, or even miniature houses to provide additional entertainment for the birds.

Beyond Functionality and Design: Environmental Impact

Bird feeders can have a significant impact on the environment. Consider using recycled materials and opting for feeders made from sustainable sources. You can also choose feeders that minimize waste by offering the right type and amount of food.

By blending functionality, design, and environmental consciousness, you can create a bird feeder that's both beautiful and beneficial. Attract a vibrant array of feathered friends to your yard and create a sanctuary that's as visually appealing as it is practical.

Share:

Profitable Wine Rack Ideas for Beginners to Sell

Profitable Wine Rack Ideas for Beginners to Sell

Profitable Wine Rack Ideas for Beginners to Sell

Hey there, fellow wine enthusiast! So you're thinking about starting a side hustle or even a full-blown business selling wine racks? Awesome! It's a fantastic idea, especially if you're passionate about wine and love working with your hands.

But let's be real, diving into the world of handcrafted wine racks can feel a bit overwhelming. There are so many options, from classic wooden racks to sleek metal designs, and you want to make sure you're creating something people will actually want to buy.

Don't worry, I'm here to help! We'll explore some profitable wine rack ideas that are perfect for beginners, covering everything from materials and design to marketing and pricing.

1. The Classic Wooden Wine Rack

Let's start with the timeless classic: the wooden wine rack. It's a crowd-pleaser for a reason! The warm, natural aesthetic of wood blends beautifully with any decor, making it a versatile choice. And the best part? It's relatively easy to create even if you're new to woodworking.

Key Points

  • Choose durable wood like pine, oak, or walnut. These woods offer good stability and look great.
  • Consider different finishes. A natural oiled finish highlights the wood's grain, while a painted finish allows for more customization.
  • Add a touch of personality. You can create unique designs by using different wood types, inlays, or even carving small details.
  • Offer various sizes and configurations. Some customers might need a small rack for a few bottles, while others might want a large one for their entire collection.
  • 2. Sleek Metal Wine Racks

    If you're looking for a more modern and minimalist vibe, metal wine racks are a fantastic option. They offer a sleek, industrial look that complements contemporary interiors.

    Key Points

  • Experiment with different metals. Steel, iron, and copper each offer unique aesthetics and durability. You can even play with different finishes, such as black powder coating or brushed brass.
  • Embrace geometric designs. Metal lends itself well to clean lines and simple shapes. You can create striking racks with triangular or rectangular configurations.
  • Consider incorporating glass or acrylic. Combining metal with clear materials adds visual interest and creates a contemporary feel.
  • Think about functionality. Metal wine racks can be designed to hold bottles horizontally or vertically, offering flexibility based on customer needs.
  • 3. Wall-Mounted Wine Racks

    Space-saving is a big concern for many wine enthusiasts. Wall-mounted wine racks are a fantastic solution, providing a stylish way to display bottles without taking up valuable floor space.

    Key Points

  • Offer a variety of styles. Wall-mounted racks can be made from wood, metal, or even repurposed materials like pallets. Experiment with different shapes and sizes to cater to different wall spaces.
  • Focus on secure mounting. Ensure that your racks are robust and have strong mounting brackets to hold the weight of the wine bottles.
  • Consider tiered designs. Tiered wall racks offer a visually appealing way to display a larger collection while maximizing space.
  • Get creative with lighting. Adding LED lights can create a dramatic and inviting display for your customer's wine collection.
  • 4. DIY Wine Rack Kits

    For customers who love a hands-on approach, DIY wine rack kits are a brilliant way to create a unique and personalized project.

    Key Points

  • Offer pre-cut wood or metal components. Make it easy for your customers by providing all the necessary pieces, along with clear instructions and assembly tools.
  • Include a range of designs and sizes. Give customers the choice of making a small, wall-mounted rack or a larger, freestanding one.
  • Focus on quality materials. Use durable, high-quality wood or metal that will withstand the weight of the bottles and time.
  • Consider adding personalization options. Customers might want to personalize their racks with engravings, custom paint colors, or unique hardware.
  • Marketing and Selling Your Wine Racks

    Now that you have some great wine rack ideas, let's talk about how to get them in front of your target audience.

    1. Online Marketplaces

  • Etsy is a great platform for handcrafted goods and is popular with wine enthusiasts.
  • Amazon Handmade allows you to reach a wider audience and benefit from Amazon's extensive shipping network.
  • Facebook Marketplace is a good way to connect with local buyers.
  • 2. Social Media

  • Instagram is perfect for showcasing your wine rack creations visually.
  • Pinterest is a great way to reach people who are looking for inspiration for their homes.
  • Create a Facebook page to engage with customers and build a community.
  • 3. Local Events and Markets

  • Participate in craft fairs, farmers' markets, and wine-themed events.
  • Connect with local wine shops and restaurants to see if they'd be interested in carrying your racks.
  • 4. Website and Blog

  • Create a website or blog to showcase your products, share your story, and offer tips on wine storage.
  • Use SEO to optimize your website for search engines so potential customers can find you.
  • Pricing Your Wine Racks

    Pricing your wine racks is key to profitability. Consider the following factors:

  • Cost of materials: This includes the price of wood, metal, hardware, and any finishes.
  • Labor costs: Factor in the time it takes you to design, cut, assemble, and finish each rack.
  • Shipping costs: If you're selling online, consider the cost of packaging and shipping.
  • Competitor pricing: Research other wine rack sellers to get an idea of what they're charging.
  • Profit margin: Aim for a healthy profit margin that will cover your expenses and provide a return on your investment.
  • Commonly Asked Questions

    What kind of tools do I need to make wine racks?

    The tools you'll need depend on the materials and designs you choose. For basic wooden racks, you'll need a saw, drill, sander, and possibly a router. For metal racks, you'll need a metal saw, drill, and possibly a welding torch. Many online resources offer detailed guides on specific tools and techniques for different wine rack styles.

    Where can I find wood and metal for my wine racks?

    Local lumber yards and hardware stores are great places to find a variety of wood types. You can also find metal at hardware stores or online retailers specializing in metalworking supplies. Don't forget to consider repurposed materials like pallets or scrap metal, which can be a great way to create unique and eco-friendly wine racks.

    What if I'm not a skilled craftsman?

    That's okay! There are many resources available to help you learn. Online tutorials, woodworking courses, and even YouTube videos can provide valuable guidance. You can also start with simpler designs and gradually build your skills over time. Remember, practice makes perfect!

    How can I get feedback on my wine rack designs?

    Share your designs on social media, join woodworking forums, or even ask friends and family for their opinions. Getting feedback can help you refine your ideas and ensure you're creating products that resonate with your target market.

    Creating and selling wine racks can be a rewarding and profitable endeavor. Don't be afraid to experiment, learn from your experiences, and let your passion for wine shine through your creations. Good luck on your wine rack journey!

    Share:

    DIY Wood Wall Clocks with Colorful Accents and Custom Designs

    DIY Wood Wall Clocks with Colorful Accents and Custom Designs

    DIY Wood Wall Clocks with Colorful Accents and Custom Designs

    Hey there, crafty friends! Are you looking for a unique and personalized way to add some character to your walls? Look no further than DIY wood wall clocks! These charming timepieces can be customized to fit any style and are surprisingly easy to make. Get ready to unleash your inner artist and craft a clock that's as unique as you are.

    Materials You'll Need

    Before we dive into the creative process, let's gather our supplies. You'll need these essential materials:

    • A wooden clock blank (round, square, or any shape you fancy!)
    • Clock mechanism (including hands and a quartz movement)
    • Sandpaper (various grits)
    • Wood stain or paint (choose your favorite colors!)
    • Paintbrushes
    • Clear sealant (optional)
    • Stencil or design template (optional)
    • Decorative embellishments (like buttons, beads, or fabric scraps) (optional)
    • Hot glue gun (for attaching embellishments)
    • Measuring tape
    • Pencil
    • Screwdriver

    Getting Started

    Now that you've gathered your materials, let's get started!

    Preparing the Clock Blank

    First, we need to prep our wooden clock blank. This ensures a smooth and even surface for painting or staining. Start by sanding the wood with progressively finer grits of sandpaper to remove any rough edges or imperfections. If you're using a pre-stained clock blank, you can skip this step. But if you're planning on painting or staining, make sure to wipe off any sanding dust before moving on.

    Designing Your Clock

    This is where your creativity shines! What kind of design are you envisioning? Do you want a minimalist look with just a simple color or a more elaborate design with intricate details? Here are some ideas to get you started:

    • Geometric Patterns: Play around with triangles, squares, circles, or other shapes.
    • Floral Motifs: Add a touch of nature with delicate flower designs.
    • Abstract Art: Experiment with different colors and textures for a unique abstract look.
    • Personalized Designs: Incorporate your initials, a special date, or a quote that resonates with you.

    Once you've decided on a design, you can use a pencil to sketch it out on the clock blank. If you're feeling a bit nervous about freehand drawing, you can always use a stencil or a design template as a guide. Remember, there's no right or wrong way to do this â€" let your imagination run wild!

    Painting or Staining

    Now it's time to add some color! If you're painting your clock blank, use a good quality acrylic paint and apply it in thin coats. Let each coat dry completely before applying the next. For a stained look, choose a wood stain in your desired color and apply it evenly to the entire clock blank. Again, let it dry thoroughly.

    For a multi-colored design, use painter's tape to mask off sections of the clock blank and apply your colors accordingly. If you're working with a stencil, secure it to the clock blank and carefully paint around the edges. Let your creative juices flow!

    Adding the Clock Mechanism

    Once your clock is painted or stained and completely dry, it's time to attach the clock mechanism. This is where precision is key, as it ensures your clock will tell time accurately.

    Use a pencil to mark the center of the clock blank. This is where you'll mount the clock mechanism. Most clock mechanisms come with a nut or screw that you'll need to insert into the back of the clock blank. Make sure the mechanism is securely attached.

    Now, carefully attach the clock hands to the mechanism according to the instructions that came with your clock kit. Make sure the hands are securely attached and point to the correct time.

    Finishing Touches

    We're almost there! Let's add the finishing touches to our DIY masterpiece.

    Adding Embellishments

    If you want to add some extra pizzazz, you can embellish your clock with decorative elements like buttons, beads, or fabric scraps. Use a hot glue gun to secure these embellishments in place. Make sure they're evenly spaced and enhance your overall design.

    Applying a Sealant

    For added protection, you can apply a clear sealant to your clock blank. This helps to preserve your design and protect the paint or stain from fading or chipping. Let the sealant dry completely before hanging your clock.

    Hanging Your Clock

    Finally, it's time to hang your beautiful DIY clock! Most clock blanks come with a hook or a D-ring on the back for easy hanging. Securely attach your clock to the wall and admire your handiwork!

    Commonly Asked Questions

    Here are some common questions you might have:

    Where can I buy clock blanks?

    Clock blanks are available at craft stores, online retailers like Amazon and Etsy, and even some hardware stores.

    What kind of paint should I use?

    Acrylic paint is a good choice for clock blanks as it dries quickly and is durable.

    How do I change the battery in my clock?

    Most clock mechanisms use AA batteries. Simply remove the back cover of the clock mechanism and replace the battery.

    How do I adjust the time on my clock?

    Most clock mechanisms have a small knob on the back that allows you to adjust the time. Simply turn the knob to set the correct time.

    Tips for Success

    Here are some additional tips to ensure your DIY clock project turns out beautifully:

    • Start with a clean surface: Make sure your clock blank is free of dust and debris before painting or staining.
    • Use a good quality paintbrush: A quality brush will give you a smoother finish and help avoid brush strokes.
    • Let each coat dry completely: Don't rush the drying process! Allowing each coat to dry thoroughly will prevent smudging and unevenness.
    • Be patient: Crafting a DIY clock takes time and attention to detail. Don't worry if it doesn't come out perfect on the first try â€" practice makes perfect!

    That's it, folks! You've now got all the information you need to create a unique and personalized wood wall clock. Don't be afraid to experiment with different colors, designs, and embellishments â€" the sky's the limit! So grab your supplies, unleash your inner artist, and let's get crafting!

    Share:

    How to Build a Business Selling Handmade Cutting Boards

    How to Build a Business Selling Handmade Cutting Boards

    Carving Out Your Niche: How to Build a Business Selling Handmade Cutting Boards

    So, you've got a knack for woodworking, a love for beautiful things, and a desire to create something with your own two hands. And, you're thinking, "Why not turn my passion into a business?" Well, my friend, you've come to the right place. Today, we're diving into the world of handmade cutting boards, a market ripe with potential for those willing to put in the work.

    Let's face it, cutting boards are a kitchen essential. They're functional, they can be a statement piece, and they're often passed down through generations. This means that if you can craft something beautiful and durable, you've got a winning recipe for success.

    But before you jump into the woodshop, let's break down the essential steps to building a thriving cutting board business.

    1. Get Your Hands Dirty: Finding Your Woodworking Niche

    First things first, you need to decide what kind of cutting board maker you want to be. Do you want to focus on:

    • Classic Designs: Think simple, rectangular boards in popular hardwoods like maple or walnut. These are a timeless choice and always in demand.
    • Unique Shapes and Sizes: Get creative with curves, rounds, and even incorporating live edges (the natural edge of the wood). This adds a rustic charm and appeals to those looking for something more unique.
    • Specialty Wood: Offer boards made from exotic woods like cherry, bamboo, or even reclaimed wood. This allows you to tap into a niche market of wood enthusiasts.
    • Personalized Boards: Add engravings, logos, or custom designs to create one-of-a-kind pieces. This is a great way to cater to wedding gifts, corporate gifts, or even personalized home décor.

    The more specific you are in your niche, the easier it will be to market your brand and connect with your target audience.

    2. Sharpen Your Skills: Mastering the Craft

    Building a successful cutting board business requires more than just a good eye for wood. You need solid woodworking skills to ensure your creations are both beautiful and safe to use.

    Here's a roadmap to getting your woodworking skills up to par:

    • Basic Woodworking Skills: You'll need to be comfortable with hand tools like chisels, planes, and saws, as well as power tools like routers, sanders, and table saws.
    • Cutting Board Construction Techniques: Learn how to glue up boards, use joinery techniques, and apply food-safe finishes.
    • Wood Selection and Finishing: Understanding the properties of different woods, their durability, and how to properly finish them is crucial.
    • Safety First: Always prioritize safety when working with wood and power tools. Invest in proper safety gear and familiarize yourself with safety procedures.

    Consider taking woodworking classes, reading books and articles, or watching online tutorials to hone your skills. The more you learn, the better your cutting boards will be, and the more confident you'll feel in your craft.

    3. Get Ready to Roll: Setting Up Your Workshop

    Now that you've got a plan and some skills under your belt, it's time to create your woodworking haven.

    Here's a checklist for setting up a functional and efficient workshop:

    • Space: You'll need enough space to comfortably work on your boards, store your tools, and handle your supplies.
    • Essential Tools: Start with the basics like a table saw, band saw, router, sander, drill press, and hand tools.
    • Dust Collection: A good dust collection system is essential for keeping your workspace clean and protecting your health.
    • Lighting: Proper lighting is crucial for accurate work.
    • Organization: Keep your tools and materials organized and easily accessible. A well-organized workshop is a productive workshop.

    Don't feel like you need to have everything at once. Start with the essentials and gradually invest in additional tools and equipment as your business grows.

    4. The Art of Marketing: Reaching Your Customers

    So, you've got beautiful cutting boards, but how do you get them into the hands of eager buyers?

    Here's a roadmap to crafting a winning marketing strategy:

    • Define Your Target Audience: Who are you trying to reach? Are you targeting home cooks, professional chefs, or gift-givers? Understanding your audience will help you tailor your marketing efforts.
    • Build an Online Presence: Create a website or online store to showcase your work.
    • Social Media Marketing: Utilize platforms like Instagram, Facebook, and Pinterest to visually showcase your cutting boards, share behind-the-scenes glimpses of your process, and connect with your audience.
    • Local Markets and Craft Fairs: Participate in local markets and craft fairs to connect with customers face-to-face and demonstrate your craftsmanship.
    • Partnerships: Collaborate with local businesses like cooking schools, restaurants, or gift shops to expand your reach.
    • Email Marketing: Build an email list and send out regular newsletters to keep customers updated on new designs, promotions, and special offers.

    Don't be afraid to experiment with different marketing strategies to find what works best for your business.

    5. Crafting Your Brand Story: Building a Connection

    Your cutting boards are more than just pieces of wood. They're a reflection of your passion, your skill, and your unique vision. Sharing your story and your values can help you create a deeper connection with your customers.

    Here's how to craft a compelling brand story:

    • Your Why: Why did you start making cutting boards? What drives your passion for woodworking? What makes your products special?
    • Your Process: Share the steps involved in creating your cutting boards, from selecting the wood to applying the finish. This gives customers a glimpse into your craftsmanship.
    • Your Values: What are your core values as a craftsman? Do you prioritize sustainability, quality, or craftsmanship? Communicating your values builds trust and resonates with customers who share your beliefs.

    By sharing your story, you create a more personal connection with customers and differentiate yourself from the competition.

    6. Pricing for Success: Balancing Value and Cost

    Pricing your cutting boards is a delicate dance. You need to factor in the cost of materials, labor, and overhead, but you also need to be competitive in the market and offer value to your customers.

    Here are some factors to consider:

    • Cost of Materials: Research the prices of different types of wood, finishes, and other materials you use.
    • Labor Costs: Calculate the time it takes you to create a cutting board and factor in your labor costs.
    • Overhead Costs: Consider your shop rent, utilities, insurance, and other expenses.
    • Market Research: Research the prices of similar cutting boards from other makers to get an idea of what your competitors are charging.
    • Value Proposition: What makes your cutting boards special? Highlight the unique features, quality, and craftsmanship that justify your price.

    Don't be afraid to experiment with different pricing strategies to find what works best for your business. You may need to adjust your prices as your business grows and you gain more experience.

    7. The Final Slice: Staying Ahead of the Game

    Building a successful cutting board business is an ongoing journey. You need to adapt to changing trends, stay informed about new techniques, and continuously improve your craft.

    Here are some tips for staying ahead of the curve:

    • Stay Current with Trends: Keep an eye on design trends, new wood species, and innovative finishes.
    • Continuously Learn: Take workshops, read industry publications, and attend trade shows to expand your knowledge and skills.
    • Seek Feedback: Ask customers for feedback on your products and services. This will help you identify areas for improvement.
    • Embrace Experimentation: Don't be afraid to experiment with new designs, techniques, and marketing strategies.

    Remember, building a business is a marathon, not a sprint. It takes dedication, passion, and a willingness to adapt. But if you're willing to put in the work, you can carve out a successful niche for yourself in the world of handmade cutting boards.

    Share:

    Give the Gift of Handmade Wood Creations

    Give the Gift of Handmade Wood Creations

    The Gift of Handmade Wood Creations

    In a world increasingly dominated by mass-produced goods, the appeal of handcrafted items has never been stronger. Handmade wood creations, in particular, possess a unique charm and value that resonates deeply with those seeking a truly special and personalized gift. From intricate carvings to functional furniture, these creations offer a tangible expression of artistry, skill, and love.

    The Enduring Allure of Wood

    Wood, as a natural material, holds a timeless appeal. Its rich grain patterns, warm tones, and inherent beauty are captivating. It evokes a sense of connection to nature and a bygone era of craftsmanship. Each piece of wood is unique, with its own story to tell, and this individuality adds to the inherent charm of handmade wood creations.

    A Gift That Speaks Volumes

    Unlike mass-produced items, handcrafted wood creations are imbued with the personality and passion of the artist. The meticulous attention to detail, the skillful manipulation of the wood, and the care that goes into each piece are palpable. This dedication translates into a gift that speaks volumes about the giver's thoughtfulness and appreciation for quality and craftsmanship.

    The Variety of Handmade Wood Creations

    The world of handmade wood creations is incredibly diverse, offering something for everyone. Here are just a few examples:

    Functional & Decorative Pieces

    • Wooden bowls and platters: These are both beautiful and practical, perfect for serving meals or showcasing fruit.
    • Cutting boards: Handmade cutting boards are a treasured kitchen essential, adding a touch of rustic charm to any counter.
    • Jewelry boxes: These offer a secure and stylish place to store precious pieces, and can be personalized with intricate carvings or engravings.
    • Clocks: Handmade wooden clocks add a unique and timeless touch to any room.

    Personalized Gifts

    • Engraved wooden signs: These are perfect for commemorating special occasions or adding a personalized touch to any space.
    • Custom picture frames: A handmade wooden frame elevates a cherished photograph, making it a truly treasured possession.
    • Wooden toys: These offer a safe and stimulating way for children to play and learn, encouraging creativity and imagination.

    Furniture & Home Decor

    • Tables and chairs: Handmade wooden furniture adds a touch of elegance and durability to any home.
    • Sculptures and figurines: These are beautiful statement pieces that can transform a space, adding a touch of artistic flair.
    • Mirrors: Handcrafted wooden frames elevate a simple mirror into a work of art.

    Why Choose Handmade Wood Creations?

    Beyond their aesthetic appeal, handmade wood creations offer a multitude of benefits:

    Uniqueness and Personalization

    Each handmade creation is one-of-a-kind, reflecting the artist's individual style and skill. This uniqueness makes it a truly special and memorable gift.

    Sustainability and Eco-friendliness

    Wood is a renewable resource, and choosing handmade wood creations supports sustainable practices and responsible forestry.

    Durability and Longevity

    Handmade wood creations are crafted with care and skill, using high-quality materials. They are built to last, becoming heirlooms that can be cherished for generations to come.

    Supporting Artisans and Craftsmanship

    By choosing handmade wood creations, you are supporting the work of skilled artisans and contributing to the preservation of traditional craftsmanship.

    Finding the Perfect Handmade Gift

    With the abundance of options available, finding the perfect handmade wood creation as a gift is easier than ever. There are numerous online platforms and local craft fairs that showcase the works of talented woodworkers.

    When choosing a handmade wood creation, consider the recipient's personality, interests, and lifestyle. Think about the occasion for the gift and the message you want to convey.

    Personalized Touches

    Many artists offer personalization options, such as engravings, custom designs, or even the inclusion of a special message. These touches make the gift even more meaningful and unique.

    More Than Just a Gift

    Handmade wood creations are not simply objects. They are tangible expressions of creativity, skill, and love. They are cherished keepsakes that evoke memories and connect people to the beauty of nature and the enduring value of craftsmanship. When you give the gift of a handmade wood creation, you are giving something truly special that will be treasured for years to come.

    Share:

    Creative Squirrel Box Building Plans for DIY Enthusiasts

    Creative Squirrel Box Building Plans for DIY Enthusiasts

    Creative Squirrel Box Building Plans for DIY Enthusiasts

    The playful antics of squirrels can bring a touch of joy to any backyard. Watching them scamper, leap, and stash away nuts is a delight for nature lovers. But sometimes, their enthusiastic foraging can lead to unwanted damage to bird feeders, gardens, and even homes. A thoughtful solution is to create a squirrel box, a charming and functional structure that provides these furry creatures with a safe and enjoyable space for their activities. This article offers comprehensive plans for constructing squirrel boxes that are both aesthetically pleasing and practical, inviting you to embark on a rewarding DIY project.

    Understanding Squirrel Behavior

    Before diving into the construction, it's essential to understand the basic needs and preferences of squirrels. This knowledge will inform the design and placement of your squirrel box, ensuring its success in attracting these charming rodents.

    Food Storage and Shelter

    Squirrels are highly territorial and will establish a "home range" where they collect and store food. A squirrel box should provide a secure space for caching nuts, seeds, and other goodies. It should also offer protection from predators and harsh weather conditions.

    Nest Box Placement

    Squirrels prefer nesting in trees, so your squirrel box should be mounted to a sturdy branch or post, preferably at a height of 6 to 10 feet. This elevated position ensures visibility of the surroundings and discourages potential ground-level predators.

    Material Selection

    For the best results, choose durable and weather-resistant materials like cedar, redwood, or pressure-treated pine. These woods are naturally rot-resistant and can withstand the elements, ensuring a long-lasting squirrel box.

    Squirrel Box Design Options

    There are many different styles and designs for squirrel boxes, each offering unique features and aesthetic appeal. Here are a few popular and practical options:

    Classic Squirrel Box

    This traditional design is characterized by a simple rectangular shape with a hinged front panel for easy access. The box can be divided into multiple chambers to accommodate different types of food storage and nesting materials. An entry hole should be placed on one of the side walls, typically at a height of 5 to 6 inches from the floor.

    Bird Feeder Squirrel Box

    This clever design combines a bird feeder with a squirrel box, providing a win-win solution for both species. The bird feeder is mounted above a squirrel box, allowing squirrels to access their own dedicated area while preventing them from interfering with the birds. This design encourages a peaceful coexistence and promotes biodiversity in your backyard.

    Squirrel House with Viewing Window

    This design offers a fascinating glimpse into the life of squirrels. A large window made of clear acrylic or Plexiglas allows you to observe their activities inside the box. The window should be placed on the front or side wall, providing an unobstructed view of the squirrel's nest and food storage areas.

    Squirrel Play Station

    For a more interactive experience, you can create a squirrel play station. This design features a series of platforms, ladders, and swings, providing squirrels with plenty of opportunities for exercise and exploration. You can even incorporate a small bird feeder into the design to encourage interactions between squirrels and birds.

    Squirrel Box Building Plans

    Now let's move on to the practical steps involved in building a squirrel box. These plans provide a detailed guide for constructing a classic squirrel box, but can be adapted to suit your preferred design and desired features.

    Materials Needed

    • Cedar, redwood, or pressure-treated pine lumber (1x6, 1x8, and 1x10 boards)
    • Wood screws (2-1/2" and 1-1/4")
    • Hinges (2)
    • Latch or lock (optional)
    • Weather-resistant sealant
    • Safety goggles and gloves
    • Saw (circular or jigsaw)
    • Drill with drill bits
    • Measuring tape
    • Pencil
    • Level

    Construction Steps

    1. Cut the lumber: Using the dimensions specified in the diagram, cut the lumber to the required sizes. For the base, two 1x10 boards should be cut to a length of 12 inches. Two side panels should be cut to a height of 8 inches and a length of 12 inches. The front and back panels should be cut to a height of 8 inches and a length of 10 inches. The roof should be cut to a length of 12 inches and a width of 12 inches. Cut a 4-inch by 4-inch square opening in the center of the front panel to create the entry hole.

    2. Assemble the box: Attach the two base boards side-by-side, using 2-1/2" wood screws. Attach the side panels to the base, ensuring that the top edges are flush with the base boards. Secure the front and back panels to the side panels, ensuring that the bottom edges are flush with the base boards. Use 2-1/2" wood screws to join the panels.

    3. Add the roof: Attach the roof to the top of the box, using 2-1/2" wood screws. The roof should overhang the sides and back of the box by at least 1 inch to provide protection from rain and snow. You can create a slight overhang for the front panel by placing the screws about 1 inch from the front edge of the box.

    4. Install the hinges: Attach the hinges to the front panel, about 2 inches from the top and bottom edges. Make sure that the hinges are placed on the outside of the box. Attach the corresponding hinge pieces to the back panel, ensuring that they align with the hinges on the front panel.

    5. Add a latch or lock (optional): If you want to secure the box, attach a latch or lock to the front panel. This is particularly useful if you want to clean the box or inspect the squirrel's nest.

    6. Seal the box: Apply weather-resistant sealant around the edges of the panels and the roof to prevent water damage. Allow the sealant to dry completely before mounting the box.

    7. Mount the box: Attach the squirrel box to a sturdy branch or post, ensuring that the box is level and secure. The mounting location should be at a height of 6 to 10 feet, providing adequate visibility and protection from predators. Use heavy-duty screws or bolts for secure mounting.

    Tips for Success

    • Choose a quiet location: Squirrels prefer areas that are relatively free from noise and human activity. Choose a location that offers some privacy and allows squirrels to feel safe and undisturbed.
    • Provide suitable nesting materials: Place a layer of shredded newspaper, straw, or wood shavings inside the box to create a cozy and comfortable nesting environment. Squirrels will add their own nesting materials, such as leaves and twigs.
    • Offer a variety of food: Stock the squirrel box with a variety of nuts, seeds, and fruits. Squirrels are omnivores and will enjoy a balanced diet. Avoid giving them processed foods or sugary snacks.
    • Maintain the box: Clean the squirrel box regularly to remove debris and prevent the buildup of parasites. Replace nesting materials every few months to ensure a hygienic and comfortable environment for the squirrels.
    • Enjoy your squirrel box: Observe the squirrels using the box and learn about their fascinating behavior. With a little patience, you'll have a wonderful opportunity to enjoy the beauty of nature up close.

    Conclusion

    Building a squirrel box is a rewarding and fulfilling DIY project that can bring a touch of wildlife wonder to your backyard. By understanding squirrel behavior and following these detailed plans, you can create a comfortable and attractive habitat for these playful creatures. Remember to enjoy the process, celebrate your creativity, and savor the joy of watching squirrels make their new home a delightful part of your natural world.

    Share:

    Squirrel Box Plans for Safe and Cozy Homes

    Squirrel Box Plans for Safe and Cozy Homes

    Squirrel Box Plans for Safe and Cozy Homes: A Comprehensive Guide

    The sight of a squirrel scampering through your backyard can be charming, but their presence can become a nuisance when they start to take up residence in your home. Squirrels are known for their relentless gnawing and can cause significant damage to your roof, attic, and walls. To prevent such unwelcome intrusions, consider providing them with a safe and cozy home of their own: a squirrel box. Building a squirrel box is a relatively straightforward task that can offer a humane solution to deter squirrels from your dwelling. This comprehensive guide will provide you with detailed plans and instructions to build a squirrel box that not only caters to their needs but also ensures the safety of your home.

    Choosing the Right Location

    The location of your squirrel box is paramount for its success. Selecting an appropriate spot will encourage squirrels to utilize it and discourage them from seeking shelter in your home.

    Factors to Consider:

    • Distance from your home: Place the box at least 20 feet away from your house to prevent squirrels from making their way into your attic or walls.
    • Tree coverage: Choose a location with nearby trees for squirrels to easily access the box and feel secure. Ideally, the tree should have a strong, sturdy branch where the box can be securely mounted.
    • Height: Mount the box 6-10 feet above ground level to protect it from predators and minimize human interaction.
    • Sun and shade: Ensure the box receives ample sunlight during the day while providing some shade in the afternoon to prevent overheating.
    • Access to food and water: Locate the box near sources of natural food, such as nut-bearing trees and shrubs, or consider providing a feeder near the box.

    Essential Materials and Tools

    Before embarking on your squirrel box construction, gather the necessary materials and tools. This list provides a comprehensive overview of what you'll need:

    Materials:

    • Wood: Use weather-resistant wood such as cedar, redwood, or pressure-treated pine. A 1x6 board or 1x8 board is a good option for the walls and roof.
    • Screws: Use galvanized screws or stainless steel screws for durability.
    • Nails: Use finishing nails for securing the roof and other components.
    • Wood glue: Use a waterproof wood glue to enhance the box's structural integrity.
    • Roofing shingles: Choose asphalt shingles or metal roofing for long-lasting weather protection.
    • Paint or stain (optional): Use a weather-resistant paint or stain to enhance the box's durability and aesthetics.
    • Hardware cloth: Use hardware cloth with a mesh size of 1/2 inch or smaller to create a barrier against predators and prevent squirrels from escaping through the entrance.

    Tools:

    • Saw: Use a circular saw or handsaw to cut the wood.
    • Drill: Use a drill with a variety of drill bits for creating pilot holes and countersinking screws.
    • Screwdriver: Use a Phillips-head screwdriver to fasten screws.
    • Hammer: Use a hammer to drive nails.
    • Measuring tape: Use a measuring tape to ensure accurate dimensions.
    • Level: Use a level to ensure the box is installed securely and horizontally.
    • Safety glasses and gloves: Wear protective gear during construction.

    Detailed Construction Plans

    This section provides step-by-step instructions for building a squirrel box. The plans are designed to create a comfortable and safe home for squirrels, while also ensuring the box is durable and weather-resistant.

    Step 1: Cut the Wood

    • Cut two pieces of wood for the sides of the box, each measuring 12 inches long and 6 inches wide.
    • Cut two pieces of wood for the front and back of the box, each measuring 12 inches long and 6 inches wide.
    • Cut two pieces of wood for the top and bottom of the box, each measuring 12 inches long and 6 inches wide.
    • Cut one piece of wood for the roof, measuring 14 inches long and 6 inches wide.
    • Cut two pieces of hardware cloth for the entrance, each measuring 3 inches long and 2 inches wide.

    Step 2: Assemble the Box

    • Attach the sides to the front and back pieces using wood glue and screws. Use screws that are long enough to penetrate the wood for a strong hold.
    • Attach the bottom piece to the assembled sides and back piece using wood glue and screws.
    • Attach the top piece to the assembled box using wood glue and screws.
    • Attach the roof piece to the top of the box using screws.
    • Secure the hardware cloth to the entrance holes with screws, making sure the mesh is flush with the wood to prevent squirrels from escaping.

    Step 3: Finishing Touches

    • Add a piece of hardware cloth to the bottom of the box to prevent predators from accessing the interior.
    • Paint or stain the box to enhance its durability and aesthetics. Use a weather-resistant paint or stain that is safe for wildlife.
    • Apply a sealant to the box to protect it from water damage.

    Installation and Maintenance

    Once the box is constructed, it's time to install it in its designated location and ensure its longevity through proper maintenance.

    Installation:

    • Select a strong, sturdy branch on a nearby tree and carefully secure the box using screws or heavy-duty wire.
    • Ensure the box is mounted securely and horizontally to prevent it from falling or tilting.
    • Consider adding a perch or landing area below the entrance hole to make it easier for squirrels to access the box.

    Maintenance:

    • Inspect the box regularly for signs of wear and tear. Replace any damaged or missing components.
    • Clean the box periodically to remove debris and maintain a healthy environment for squirrels.
    • Keep the entrance hole clear of obstructions.
    • If the box becomes overcrowded, consider adding a second box to accommodate the population.

    Tips for Encouraging Occupancy

    Once the box is installed, there are several measures you can take to attract squirrels and encourage them to make it their home.

    • Provide food: Place a squirrel feeder near the box with a variety of nuts, seeds, and fruits.
    • Provide water: Place a shallow dish of fresh water near the box.
    • Create a natural environment: Plant trees, shrubs, and flowers to provide squirrels with a safe and comfortable habitat.
    • Leave the box undisturbed: Avoid disturbing the squirrels, especially during nesting season.

    Conclusion

    Building a squirrel box can be a rewarding experience, offering a humane solution to deter squirrels from your home while providing them with a safe and cozy haven. By following these detailed plans and guidelines, you can create a welcoming environment for squirrels, helping to maintain a harmonious coexistence between wildlife and humans.

    Share:

    The Ultimate Cold Frame Building Guide

    The Ultimate Cold Frame Building Guide

    The Ultimate Cold Frame Building Guide

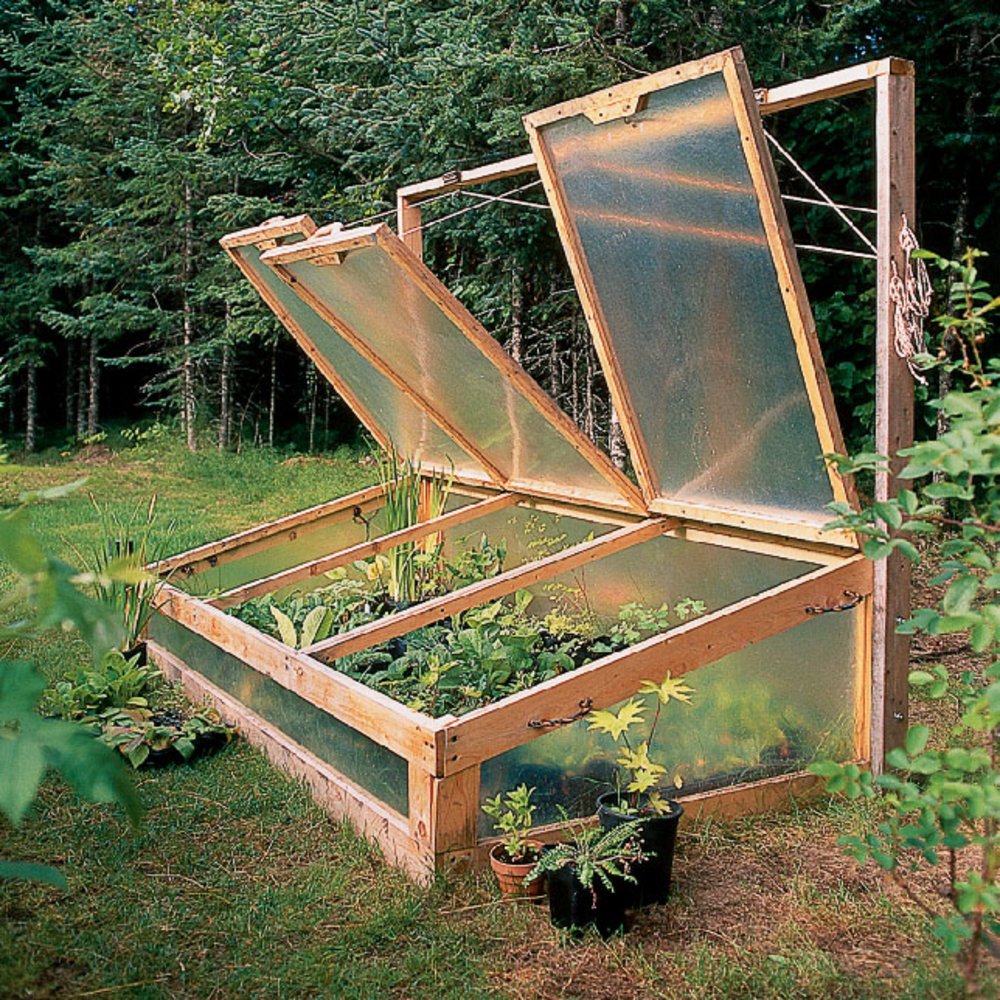
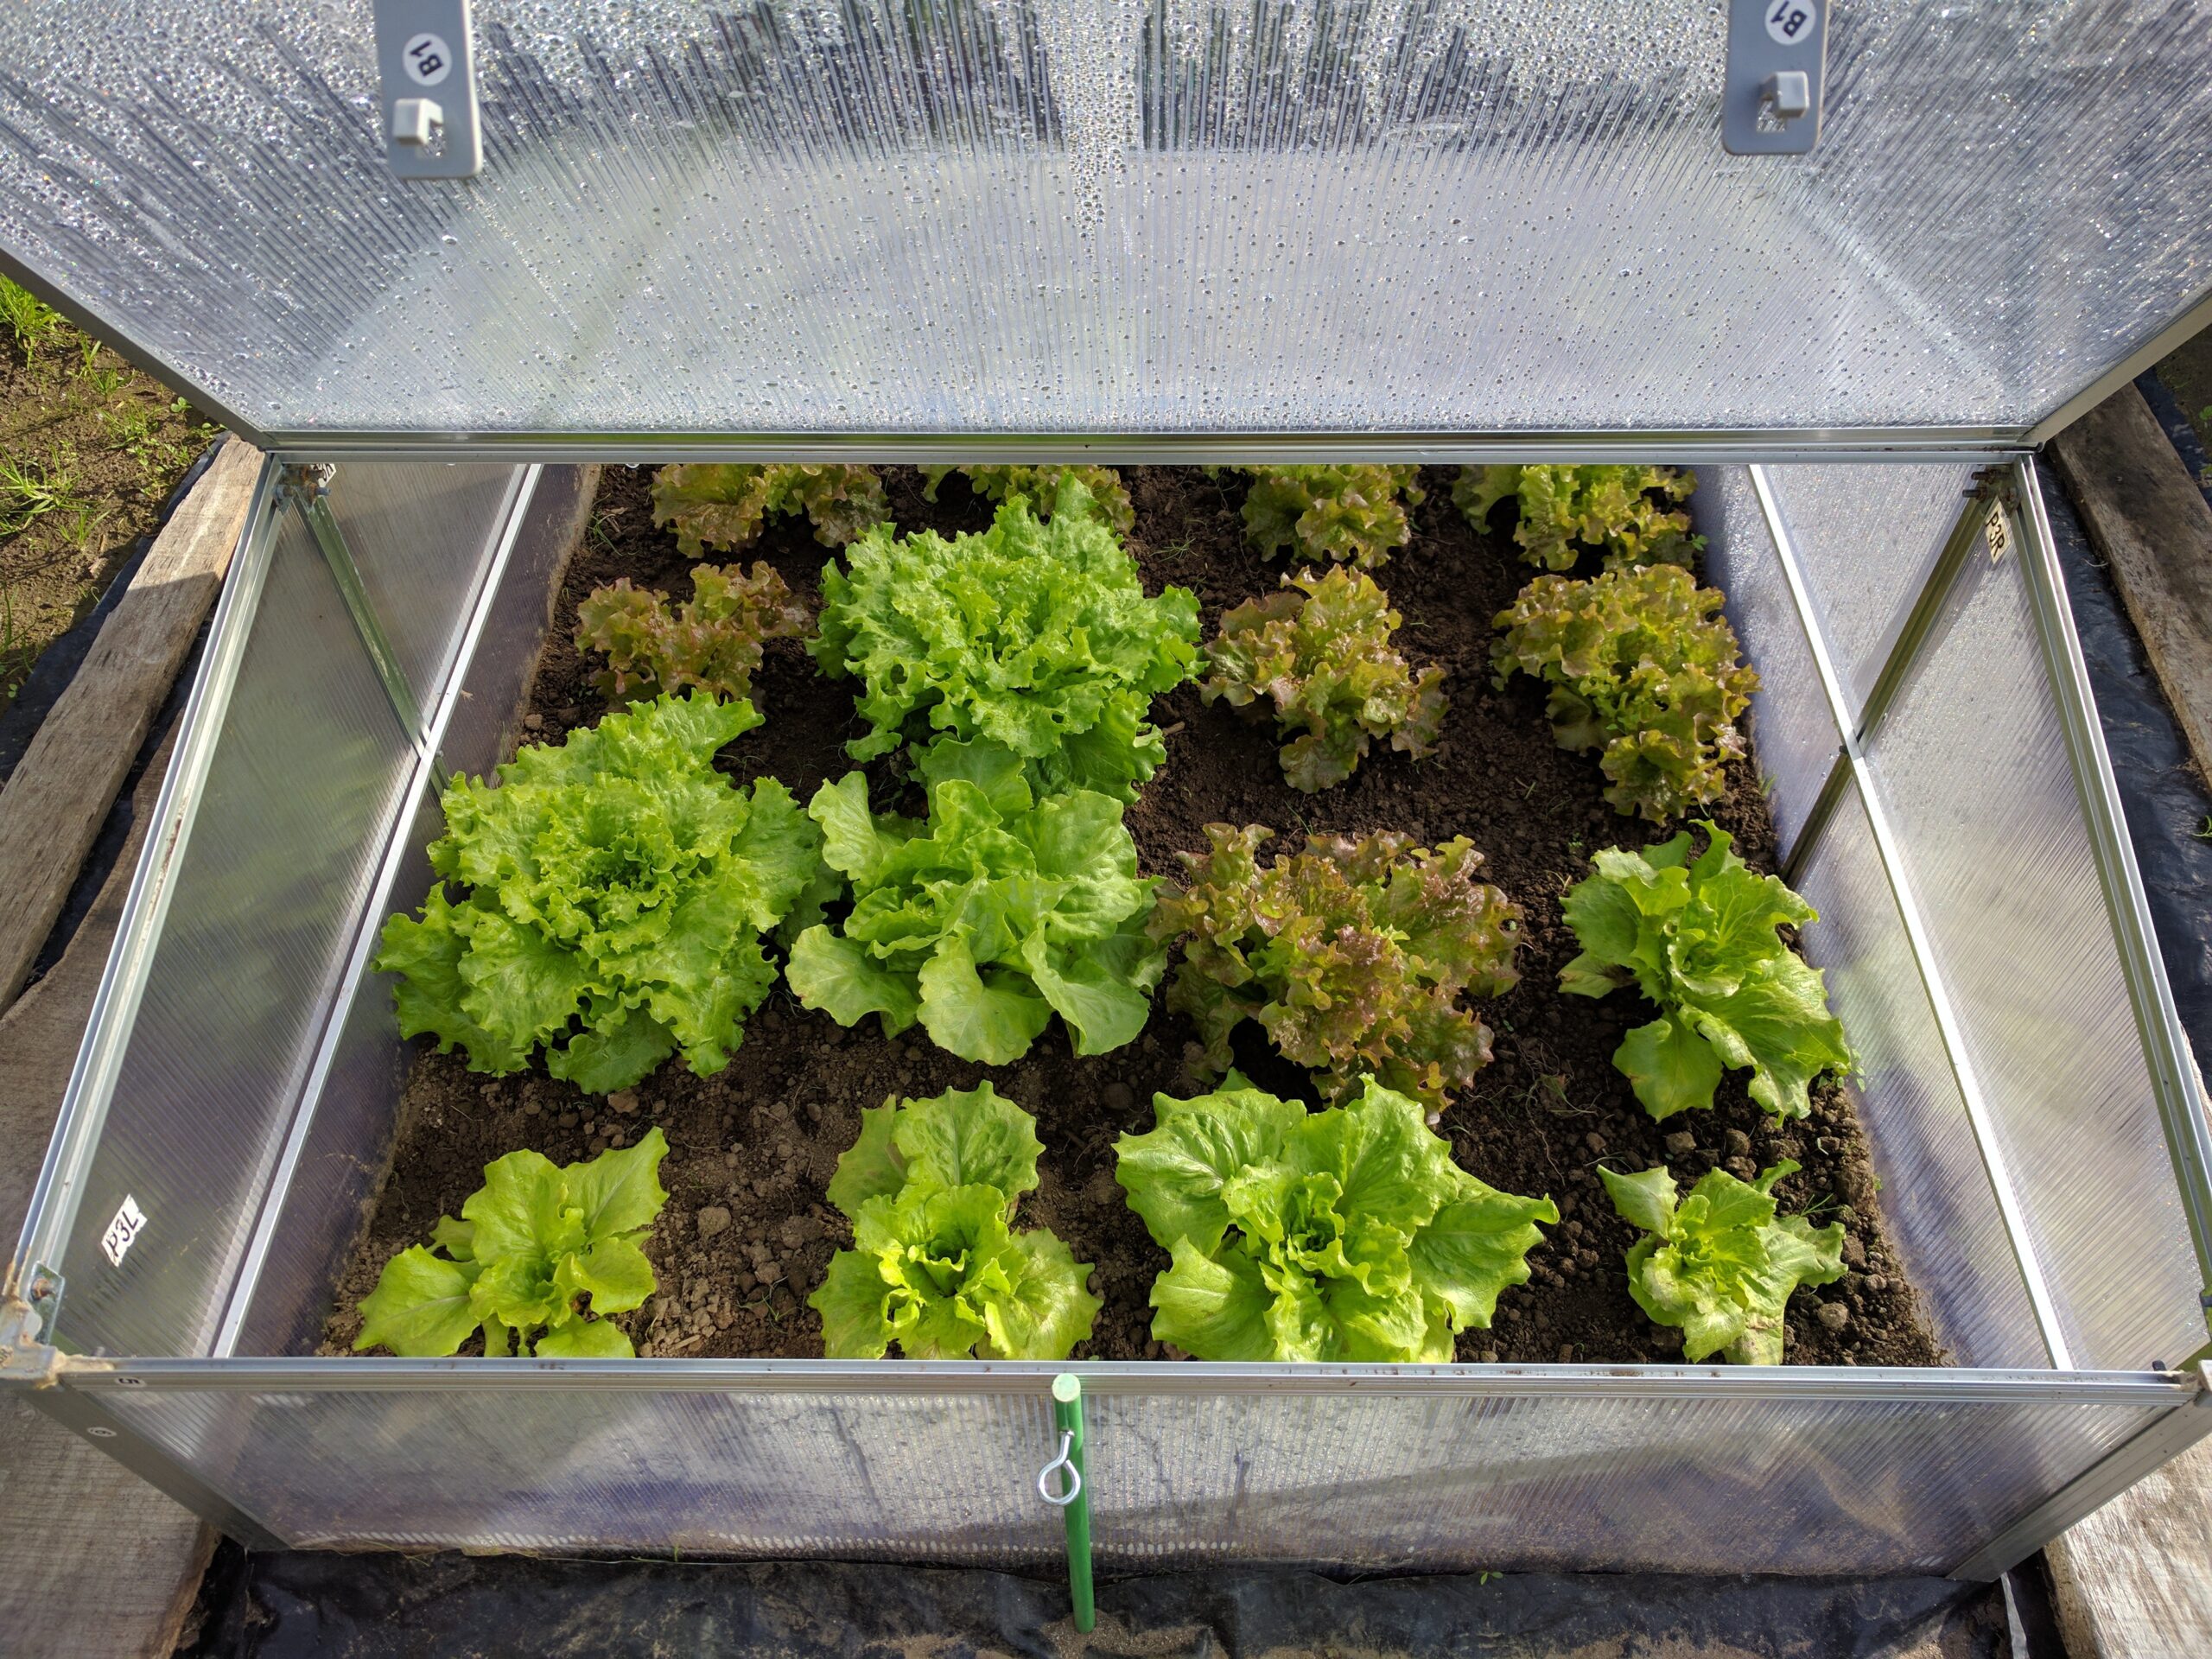
    A cold frame is a simple, yet invaluable tool for gardeners seeking to extend their growing season and nurture delicate seedlings. This structure provides a controlled environment that shelters plants from harsh weather conditions while allowing them to bask in the warmth of the sun. Building a cold frame is a rewarding endeavor, enabling you to create a customized haven for your plants, tailored to your garden’s specific needs. This comprehensive guide will walk you through the process of constructing a cold frame, equipping you with the knowledge and skills to build your own sanctuary for plant growth.

    Understanding Cold Frames

    Before diving into the construction process, it’s crucial to understand the fundamental principles behind cold frames. Essentially, they function as mini greenhouses, trapping solar heat within their enclosed space. This trapped heat warms the soil and air, creating a microclimate that allows plants to thrive in conditions that would otherwise be unfavorable. The design of a cold frame facilitates this process by maximizing solar energy absorption and minimizing heat loss.

    Benefits of Using a Cold Frame

    Utilizing a cold frame offers numerous benefits for gardeners:

    • Extended Growing Season: Cold frames allow you to start seeds earlier in the spring and extend your harvest into the fall.
    • Protection from Frost: The enclosed environment shields plants from frost damage, safeguarding your valuable seedlings.
    • Controlled Environment: Cold frames provide a semi-controlled environment, enabling you to regulate factors like temperature, moisture, and light exposure.
    • Seedling Hardening Off: Gradual exposure to outdoor conditions within a cold frame helps seedlings acclimate before transplanting them into the garden.
    • Cost-Effectiveness: Cold frames are relatively inexpensive to build and maintain, offering a budget-friendly solution for extending your garden.

    Choosing the Right Cold Frame Design

    The ideal cold frame design depends on your specific needs and the available space in your garden. Popular options include:

    Lean-To Cold Frame

    This design features a sloping roof that leans against an existing wall or fence. It is simple to construct and maximizes space efficiency.

    Freestanding Cold Frame

    A freestanding cold frame is independent and can be positioned anywhere in your garden. These frames offer flexibility and can be easily relocated.

    Raised Cold Frame

    Raised cold frames are elevated from the ground, offering improved drainage and accessibility. This design is particularly beneficial in areas with poor soil drainage.

    Materials and Tools

    To construct a cold frame, you’ll need the following materials and tools:

    Materials

    • Frame: Wood, PVC pipe, metal, or recycled materials like pallets or window frames
    • Glazing: Glass, polycarbonate sheets, or acrylic panels
    • Fasteners: Screws, nails, or bolts
    • Weatherstripping: For sealing gaps and preventing drafts
    • Soil: Potting soil, compost, or a mixture of both

    Tools

    • Saw: Circular saw, hand saw, or jigsaw
    • Drill: With appropriate drill bits
    • Screwdriver: Phillips and flathead
    • Measuring tape and level: For accurate measurements and leveling
    • Safety glasses and gloves: For protection while working

    Construction Steps

    Building a cold frame involves a series of steps, ensuring a sturdy and functional structure:

    Step 1: Planning and Design

    Begin by deciding on the dimensions, shape, and placement of your cold frame. Consider the available space, the types of plants you intend to grow, and the amount of sunlight your garden receives.

    Step 2: Constructing the Frame

    Cut and assemble the frame according to your chosen design. Ensure that the frame is square and level for stability. Use appropriate fasteners to secure the frame pieces.

    Step 3: Glazing the Frame

    Cut and attach the glazing material to the frame. Leave a small gap between the glazing and the frame to allow for ventilation. Use weatherstripping to seal any gaps and prevent drafts.

    Step 4: Preparing the Soil

    Fill the cold frame with a suitable potting mix or compost. Ensure that the soil is well-drained to prevent waterlogging.

    Step 5: Planting and Maintenance

    Once the cold frame is assembled, you can start planting your seeds or seedlings. Provide adequate watering and monitor the temperature and moisture levels inside the frame.

    Tips for Success

    Here are some additional tips to optimize your cold frame usage:

    • Choose the Right Location: Place your cold frame in a sunny spot with good drainage.
    • Ventilate Regularly: Open the vents or lids on your cold frame to regulate temperature and prevent condensation buildup.
    • Monitor Temperature: Use a thermometer to keep track of the temperature inside the cold frame, adjusting ventilation as needed.
    • Water Consistently: Keep the soil moist, but not soggy, as excessive watering can lead to root rot.
    • Protect from Pests and Diseases: Regularly inspect your plants for signs of pests or diseases and take appropriate measures to control them.

    Conclusion

    Building a cold frame is an enriching experience that empowers gardeners to extend their growing season and nurture their plants in a controlled environment. By following this guide, you can confidently construct a sturdy and functional cold frame, providing your plants with the ideal conditions for growth and success. Enjoy the benefits of an extended harvest, the joy of nurturing delicate seedlings, and the satisfaction of creating a personalized haven for your plants.

    Share:

    Smart Storage Solutions with DIY Bedside Cabinets

    Smart Storage Solutions with DIY Bedside Cabinets

    Smart Storage Solutions with DIY Bedside Cabinets

    In the realm of interior design, optimizing space is paramount. Particularly in the bedroom, where comfort and functionality intertwine, bedside cabinets play a crucial role in both aesthetics and practicality. While prefabricated cabinets offer convenience, their limitations in terms of size, style, and budget often necessitate a more creative approach. This is where DIY bedside cabinets shine, providing a bespoke solution that aligns with individual needs and preferences. By embracing the do-it-yourself philosophy, you can transform simple materials into elegant and functional storage solutions, adding a touch of personal charm to your bedroom sanctuary.

    Benefits of DIY Bedside Cabinets

    The allure of crafting your own bedside cabinets extends far beyond mere cost savings. It unlocks a world of possibilities, allowing you to tailor your furniture to perfectly complement your bedroom's existing decor and fulfill your specific storage requirements.

    Customization and Personalization

    DIY bedside cabinets offer unparalleled freedom in terms of customization. You can choose the dimensions, style, and finish that best suit your space and personal taste. Whether you envision sleek modern designs, rustic farmhouse aesthetics, or classic traditional styles, the possibilities are endless.

    Cost-Effectiveness

    Creating your own bedside cabinets can significantly reduce costs compared to purchasing pre-made options. By utilizing readily available materials and harnessing your own skills, you can achieve substantial savings without compromising on quality.

    Unique Style and Character

    DIY projects allow you to imbue your furniture with a distinct personality. By incorporating unique details, textures, and finishes, you can create bedside cabinets that reflect your individuality and enhance the overall character of your bedroom.

    Enhanced Functionality

    DIY bedside cabinets provide the opportunity to design storage solutions tailored to your specific needs. You can include drawers, shelves, compartments, and other features to optimize storage capacity and keep your belongings organized.

    Materials and Tools

    The materials and tools required for building DIY bedside cabinets vary depending on the chosen design. However, some common essentials include:

    Wood

    Wood is a popular material for bedside cabinets due to its durability, versatility, and aesthetic appeal. Consider options like pine, maple, oak, or plywood, depending on your budget and desired style.

    Hardware

    You'll need hinges, drawer slides, knobs, pulls, and other hardware to assemble and finish your cabinets. Choose durable and stylish options that complement your design.

    Tools

    Essential tools include a saw, drill, screwdriver, sander, measuring tape, level, and clamps.

    Design Inspiration

    Before embarking on your DIY bedside cabinet project, it's essential to gather design inspiration. Browse online resources, magazines, and design blogs to find ideas that align with your bedroom's style and functionality needs. Consider factors such as:

    Size and Shape

    Determine the ideal size and shape of your bedside cabinets to fit comfortably within your bedroom layout. Factor in the available space and the amount of storage you require.

    Style

    Choose a style that complements your bedroom decor. Do you prefer modern, rustic, minimalist, or traditional aesthetics? Let your existing furniture and decor guide your design choices.

    Features

    Think about the features you want to incorporate, such as drawers, shelves, compartments, or open spaces. Consider the types of items you plan to store and design your cabinets accordingly.

    Finishing Touches

    Add finishing touches that enhance the visual appeal and functionality of your bedside cabinets. You can paint or stain the wood, add decorative accents, or integrate lighting elements for a touch of ambiance.

    DIY Bedside Cabinet Project Ideas

    Here are some inspiring DIY bedside cabinet projects to get your creative juices flowing:

    Floating Bedside Shelves

    For a minimalist and contemporary feel, consider creating floating bedside shelves. This design maximizes space by eliminating bulky legs and provides a sleek, unobtrusive storage solution. You can use simple wood planks and brackets, or explore more intricate designs with curves and angles.

    Repurposed Drawers

    Give old drawers a new lease on life by transforming them into unique bedside cabinets. You can refinish the drawers, add decorative hardware, and attach legs for a stylish and functional storage solution.

    Crate Bedside Cabinet

    Embrace a rustic charm by using wooden crates as the base for your bedside cabinets. Stack crates to create tiered storage, or use a single crate as a platform for a single drawer. You can paint, stain, or leave the crates in their natural state for a raw and authentic look.

    DIY Pallet Bedside Cabinet

    Upcycle pallets by transforming them into sturdy and unique bedside cabinets. You can construct a simple cabinet with a pallet and a few pieces of wood, or get creative by adding drawers, doors, and other features.

    Tips for Success

    To ensure a successful DIY bedside cabinet project, follow these helpful tips:

    • Plan your project carefully: Before you start, create detailed plans, including measurements, materials, and construction steps. This will help ensure a smooth and efficient process.
    • Use quality materials: Invest in quality wood and hardware to ensure durability and longevity. Avoid using cheap materials that might compromise the structure and aesthetics of your cabinets.
    • Measure twice, cut once: Accuracy is crucial in carpentry. Take precise measurements and double-check them before making any cuts. This will help prevent costly mistakes and ensure a professional-looking finish.
    • Use proper safety precautions: Always wear safety glasses and gloves when working with power tools. Be mindful of sharp edges and potential hazards.
    • Sand smoothly: Sand all surfaces thoroughly to create a smooth and uniform finish. This will enhance the visual appeal and make painting or staining easier.
    • Finish with style: Choose a paint or stain that complements your bedroom decor. You can also add decorative hardware, lighting elements, or other embellishments to personalize your cabinets.

    Conclusion

    DIY bedside cabinets are an excellent way to enhance your bedroom's functionality and style without breaking the bank. By embracing the do-it-yourself approach, you can unleash your creativity and design storage solutions tailored to your individual needs and preferences. With the right materials, tools, and a dash of inspiration, you can transform simple materials into elegant and functional pieces that elevate your bedroom's charm and make a statement.

    Share:

    Top Squirrel Box Plans for Any Skill Level

    Top Squirrel Box Plans for Any Skill Level

    Top Squirrel Box Plans for Any Skill Level

    Squirrel boxes, also known as squirrel feeders, are a great way to provide a safe and comfortable home for these playful creatures. They can also help to keep squirrels out of your bird feeders! If you're looking for some inspiration for building your own squirrel box, then you've come to the right place! Here's a guide to some of the top squirrel box plans for any skill level.

    Beginner-Friendly Squirrel Box Plans

    If you're new to woodworking or simply want a quick and easy project, there are many beginner-friendly squirrel box plans available online. These plans typically use simple designs and readily available materials. They also provide clear instructions that are easy to follow.

    The Basic Squirrel Box

    This is a simple design that can be built using just a few basic tools. It's perfect for beginners who want to get their feet wet in woodworking. Start by creating a basic square box with a hole for access. You can add a hinged roof for easy access and cleaning. Make sure the entrance is big enough for the squirrels. Be sure to add some ventilation holes to the sides.

    Intermediate Squirrel Box Plans

    If you're looking for a slightly more challenging project, there are many intermediate squirrel box plans available. These plans often feature more complex designs, like a roof with a gable or a raised platform for the squirrels. They may also require the use of more specialized tools.

    The Squirrel Mansion

    This plan is great for those who want to build a more luxurious home for their squirrels. It features a multi-level design with several rooms for the squirrels to explore. You can also add a porch or a balcony to give them some outdoor space. With this plan, you'll need to be comfortable working with different wood cuts and shapes.

    Advanced Squirrel Box Plans

    If you're an experienced woodworker and are looking for a truly challenging project, there are a few advanced squirrel box plans available. These plans often feature elaborate designs, such as a combination of different wood types, multiple levels, and intricate details. You'll need a good understanding of woodworking techniques and a range of tools to complete these projects.

    The Squirrel Condo

    This plan takes luxury to a whole new level! It features a complex multi-level design with multiple entry points and a variety of rooms. This is a great project to showcase your woodworking skills. You'll need to have advanced knowledge of woodworking techniques.

    Tips for Building a Squirrel Box

    No matter which plan you choose, there are a few general tips to keep in mind when building a squirrel box:

    • Choose the right materials.
    • Make sure the box is large enough.
    • Add a ventilation hole.
    • Think about the squirrels.
    • Make sure the box is safe.
    • Place the box in a safe location.
    • Enjoy!

    Building a squirrel box is a rewarding experience. You'll get to use your woodworking skills and provide a safe and comfortable home for these fascinating creatures. Just make sure to use high-quality materials and follow the instructions carefully to ensure that your squirrel box is well-built and safe. Happy building!

    Share:

    Woodworking magic box plans with detailed instructions

    Woodworking magic box plans with detailed instructions

    The Enchanting Magic Box: A Woodworking Guide

    Unleash the magician within and craft a captivating magic box, a treasure trove of illusion and wonder. This guide provides comprehensive instructions, encompassing material selection, construction techniques, and finishing touches, to guide you in building your own enchanting magic box.

    Material Selection: Crafting the Foundation

    The magic box's allure begins with its material foundation. Select wood species that exude elegance and durability. The following are highly recommended for this project:

    Wood Types

    • Cherry: Known for its warm, reddish-brown hues and beautiful grain patterns, cherry imparts a classic elegance to the box.
    • Walnut: Rich, dark brown with intricate grain patterns, walnut adds sophistication and visual depth to the project.
    • Mahogany: Possessing a deep, reddish-brown tone and captivating grain, mahogany offers a luxurious and timeless appeal.
    • Maple: With its pale, creamy color and tight grain, maple provides a bright and clean aesthetic, suitable for intricate details.

    Essential Materials

    • Wood planks: Choose 1/2-inch thick planks for the box's main construction. Ensure they are free of knots and defects.
    • Wood glue: Opt for a high-quality wood glue for strong and lasting bonds.
    • Screws: Select small screws, ideally brass-coated, for secure assembly.
    • Finishing supplies: Sandpaper (various grits), wood stain (optional), wood sealer, and a clear varnish or polyurethane for a durable and lustrous finish.
    • Hardware: Hinges (2), a magnetic latch, and a decorative handle for a touch of charm.

    Construction: Building the Illusion

    The magic box's construction is a dance of precision and artistry. Follow these steps to create a sturdy and aesthetically pleasing structure:

    Cutting and Shaping

    • Design the box's dimensions. A typical size is 6 inches wide, 6 inches deep, and 4 inches high. Adjust these dimensions to your preference.
    • Cut the wood planks into the required lengths and widths using a table saw or jigsaw. Remember to account for joint overlap for the box's sides.
    • Cut the base and lid pieces, ensuring they are precisely the size of the box's interior.

    Assembling the Sides

    • Apply wood glue to the edges of the side panels, ensuring a thin, even layer.
    • Carefully join the side panels, aligning the edges precisely. Clamp the sides together firmly until the glue dries.
    • Use screws to reinforce the joints for added durability. Position the screws strategically for concealed aesthetics.

    Attaching the Base and Lid

    • Apply wood glue to the edges of the base and lid pieces.
    • Position the base onto the bottom of the box, ensuring it is centered and aligned with the sides. Clamp firmly until the glue dries.
    • Repeat the process for the lid, ensuring it fits snugly over the box. Use screws to reinforce the lid's attachment.

    Adding Hinges and Latch

    • Determine the hinge placement on the lid and box. Mark the hinge positions clearly.
    • Attach the hinges to the lid and box using screws, ensuring they are properly aligned.
    • Mount the magnetic latch on the lid and its counterpart on the box, ensuring a secure closure.

    Incorporating the Handle

    • Select a decorative handle that complements the box's style.
    • Measure the desired position for the handle on the lid. Mark the handle's placement clearly.
    • Attach the handle to the lid using appropriate screws or hardware.

    Finishing Touches: Enhancing the Enchantment

    The magic box's final stage involves refining its aesthetics and durability.

    Sanding

    • Sand the entire box surface using progressively finer grits of sandpaper. This smooths out any imperfections and prepares the wood for finishing.
    • Pay special attention to corners and edges for a clean and polished look.

    Staining (Optional)

    • If desired, apply a wood stain to enhance the wood's natural color and add depth to the box.
    • Choose a stain color that complements the chosen wood type. Follow the stain's instructions carefully.

    Sealing and Varnishing

    • Apply a wood sealer to protect the box from moisture and stains. This creates a barrier between the wood and the finish.
    • Follow the sealer's instructions regarding drying time.
    • Apply multiple coats of a clear varnish or polyurethane. This creates a durable and lustrous finish, highlighting the wood's grain and protecting it from wear.

    The Unveiling: Bringing the Magic to Life

    With the box meticulously crafted and finished, it's time to unveil its enchanting potential. Fill it with captivating treasures, create illusions, or simply marvel at its beauty. This woodworking project is a testament to your creativity and craftsmanship, a testament to the enduring magic of wood and its ability to inspire wonder.

    Share:

    Simple Steps to Build a Squirrel Den Box

    Simple Steps to Build a Squirrel Den Box

    Build a Squirrel Den Box: A Step-by-Step Guide

    Adding a squirrel den box to your yard can bring a touch of nature's charm and provide a safe haven for these energetic critters. Building one is a rewarding project that allows you to connect with nature and contribute to local wildlife. This step-by-step guide will help you create a cozy and secure squirrel home.

    Materials You'll Need

    Before embarking on your squirrel den box construction, gather the necessary materials. You'll need:

    • Wood: Choose a rot-resistant wood like cedar, redwood, or pressure-treated lumber. A 1x6 board for the base and sides, and a 1x4 board for the roof will work well.
    • Screws: Use 1-1/2" or 2" wood screws to secure the pieces together.
    • Wood glue: This will add extra strength and stability to your den box.
    • Saw: You'll need a saw to cut the wood to the desired dimensions.
    • Drill: A drill with a bit that matches the size of your screws will come in handy.
    • Measuring tape: Essential for accurate measurements.
    • Level: Ensure your den box is built on a level surface for stability.
    • Sandpaper: Smooth out any rough edges to prevent splinters.
    • Paint or stain (optional): Enhance the longevity and aesthetic appeal of your squirrel den box with a weather-resistant paint or stain.

    Building the Squirrel Den Box

    Follow these steps to build your squirrel den box:

    Step 1: Cut the Wood

    Using your saw, cut the 1x6 board into four pieces for the sides and base. The dimensions of the base should be 12" by 12". Cut the 1x4 board into two pieces for the roof, which should be 12" by 14" each.

    Step 2: Assemble the Base and Sides

    Place the four side pieces on top of the base piece, ensuring they form a square. Secure them together with wood glue and screws, making sure the screws are long enough to penetrate both the sides and the base.

    Step 3: Attach the Roof

    Place the two roof pieces on top of the base and sides, overlapping them slightly to form a gable roof. Secure the roof to the sides using wood glue and screws.

    Step 4: Create the Entrance

    Using your saw, cut a 4" by 4" hole on one side of the den box for the entrance. Be sure the opening is high enough for a squirrel to easily enter and exit the box.

    Step 5: Finish and Install

    Sand any rough edges and corners to make the den box smooth and splinter-free. Paint or stain the den box (optional) with weather-resistant paint or stain to protect it from the elements.

    Choose a location for your squirrel den box that provides shade and protection from the elements. Attach the box to a tree or a sturdy post using sturdy brackets or wires.

    Enjoy Your Squirrel Den Box

    Congratulations! You've successfully built a squirrel den box, a welcome addition to your yard. Observe as squirrels explore their new home, adding a touch of wilderness to your surroundings. Remember to periodically check the den box for signs of wear and tear, and replenish any bedding material as needed.

    Share:

    How to Make a Birdhouse with a Rounded Roof for a Unique Look

    How to Make a Birdhouse with a Rounded Roof for a Unique Look

    Building a Birdhouse with a Rounded Roof: A Unique and Charming Design

    Looking to create a unique and charming birdhouse that will attract feathered friends to your yard? Building a birdhouse with a rounded roof adds a touch of whimsy and personality while providing shelter for our winged neighbors. This step-by-step guide will walk you through the process of crafting a beautiful and functional birdhouse that you can customize to your liking.

    Gather Your Supplies

    Before you begin, gather all the necessary materials. You'll need:

    • Wood: Choose durable wood like cedar, pine, or redwood.
    • Plywood or Masonite for the roof
    • Wood glue
    • Wood screws
    • Paint or stain (optional)
    • Saw (circular or jigsaw)
    • Drill
    • Measuring tape
    • Pencil
    • Sandpaper
    • Safety glasses
    • Gloves

    Designing Your Birdhouse

    Consider the following design elements for your birdhouse:

    • Size: Research the size of the birds you want to attract and choose dimensions accordingly.
    • Entrance Hole: Use a drill bit to create a circular entrance hole. The size should match the bird species you want to attract.
    • Rounded Roof: This is where the unique charm comes in! You can achieve a rounded roof by using a template or by carefully shaping the wood with a jigsaw.
    • Ventilation: Add small ventilation holes to the sides or back of the birdhouse to allow air circulation.

    Building the Birdhouse

    Constructing the Base and Walls

    Start by cutting out the pieces for the base and walls of the birdhouse. Cut four pieces of wood for the walls and one piece for the base. Ensure the dimensions are correct, allowing for the thickness of the wood when joining the walls.

    Using wood glue and screws, securely join the walls to the base, forming a box shape. You can reinforce the corners with additional wood for extra strength.

    Creating the Rounded Roof

    This is the most creative part of the process. For a simple rounded roof, use a template, like a bowl or plate, to trace the shape onto the plywood or Masonite. Cut the shape out carefully with a jigsaw, leaving a small overhang for the eaves.

    For a more elaborate rounded roof, you can use a compass or a flexible molding strip to draw a curved shape. Cut the curved shape with a jigsaw, leaving a small overhang for the eaves.

    Attaching the Roof

    Once you've cut out the rounded roof, attach it to the birdhouse using wood glue and screws. Securely attach the roof to the walls, ensuring it's tightly attached.

    Adding the Entrance Hole

    Select the location for the entrance hole and drill a circular hole using a drill bit that matches the size of the bird species you want to attract. Be sure to drill the hole at a slight upward angle to prevent rain from entering.

    Finishing Touches

    Sand down all surfaces smoothly, removing any rough edges or splinters. Apply paint or stain to personalize the birdhouse. If desired, you can add decorative elements, like a birdhouse plaque or a small bird sculpture.

    Installing Your Birdhouse

    Choose a location for your birdhouse that offers protection from predators and direct sunlight. You can mount it on a tree, a fence post, or a wall. Secure the birdhouse firmly to its mounting point.

    Enjoy Your Birdhouse

    Your unique birdhouse is ready to attract feathered friends! Now, sit back and enjoy the beauty of nature, knowing you've provided a safe and stylish haven for birds to call home.

    Share:

    Build Your Own Cold Frame: Step-by-Step Guide

    Build Your Own Cold Frame: Step-by-Step Guide

    Build Your Own Cold Frame: A Step-by-Step Guide

    A cold frame is a simple, yet versatile structure that can extend your gardening season and provide a head start for your plants. It's essentially a mini greenhouse, trapping solar heat to create a warmer microclimate for seedlings, cuttings, and even overwintering plants. Building your own cold frame offers the advantage of customization, allowing you to tailor it to your needs and garden space. This guide will walk you through the process, step-by-step.

    Step 1: Planning and Design

    Before you start building, it's crucial to plan your cold frame. This involves considering factors such as:

    Size and Placement

    The size of your cold frame depends on the number of plants you intend to grow. A smaller frame, measuring about 3x4 feet, is suitable for a few dozen seedlings. Larger frames, up to 6x8 feet, can accommodate a greater variety of plants. Choose a location that receives ample sunlight, ideally facing south for maximum heat absorption. The location should also have good drainage to prevent waterlogging.

    Materials

    Various materials can be used for constructing a cold frame. Popular options include:

    • Wood: This is a traditional and readily available material. It can be used for both the frame and the cover.
    • Metal: Aluminum or galvanized steel offers durability and resistance to weather. It can be used for the frame, and metal sheets can be used for the cover.
    • Plastic: Lightweight and inexpensive, plastic can be used for the cover and, in some cases, the frame.
    • Recycled Materials: Creative gardeners often use salvaged materials such as old windows, pallets, or bricks to build their cold frames.

    Design Options

    There are several cold frame designs, each with its own advantages:

    • Traditional Cold Frame: Consists of a wooden frame with a hinged lid that allows for ventilation. The lid is typically made of glass, polycarbonate sheets, or acrylic.
    • Raised Cold Frame: Elevated on a platform made of bricks, cinder blocks, or even recycled pallets. This design allows for better drainage and access.
    • Lean-To Cold Frame: Leans against a wall or fence, utilizing the existing structure for support.

    Step 2: Gathering Materials

    Once you've decided on the size, materials, and design, gather the necessary supplies. For a traditional wooden cold frame, you'll need:

    • Wooden planks (2x4s or 2x6s)
    • Wood screws or nails
    • Screwdriver or hammer
    • Measuring tape
    • Level
    • Saw (circular saw or hand saw)
    • Safety glasses
    • Covering material (glass, polycarbonate, or acrylic)
    • Hinges
    • Clamps or fasteners for securing the cover
    • Soil (potting mix or garden soil)

    Step 3: Building the Frame

    Follow these steps to construct the frame:

    Cutting the Wood

    Use a saw to cut the wooden planks to the desired dimensions. Be sure to measure carefully and make precise cuts for a sturdy and well-fitting frame.

    Assembling the Frame

    Start by building the base of the cold frame. Join the planks together using screws or nails, ensuring the corners are square and secure. Attach the sides to the base, making sure they are upright and level. You may need to use brackets or braces for additional support.

    Adding the Lid

    Construct the lid using the same methods as the base. Cut the wood to size, assemble the frame, and attach hinges to the lid for easy opening and closing.

    Step 4: Attaching the Cover

    Once the frame is built, secure the cover material. For glass panes, use glazing points and putty to secure them in place. Polycarbonate sheets or acrylic panels can be attached using screws or clamps.

    Step 5: Setting up the Cold Frame

    Position the cold frame in its designated location and ensure it is level. Add soil to the interior, and you're ready to start using your new cold frame.

    Step 6: Using Your Cold Frame

    A cold frame can be used for various purposes throughout the year:

    Starting Seeds

    The controlled environment of a cold frame allows you to start seeds earlier in the season than you could outdoors. Sow seeds directly into seed trays or pots placed inside the cold frame. The trapped heat will help seedlings germinate faster and grow strong.

    Hardening Off Seedlings

    Once seedlings have developed true leaves, they need to be gradually acclimated to outdoor conditions. A cold frame can be used for this process, gradually exposing seedlings to more sunlight and cooler temperatures over several days.

    Growing Cuttings

    A cold frame provides a protected environment for rooting cuttings. Place the cuttings in a pot or tray filled with rooting medium and cover them with a plastic dome or sheet to maintain humidity.

    Overwintering Plants

    In colder climates, tender plants can be overwintered in a cold frame. Move your plants into the frame during the fall and provide them with adequate protection against frost. The cold frame will help keep them alive until spring when they can be replanted outdoors.

    Step 7: Maintenance

    Regular maintenance is essential for keeping your cold frame in good condition:

    • Ventilation: Open the lid on sunny days to allow for air circulation and prevent overheating.
    • Watering: Keep the soil moist, but avoid overwatering.
    • Cleaning: Regularly remove any debris or leaves that accumulate inside the frame.
    • Winterization: If you plan to use the cold frame overwinter, ensure the cover material is in good condition and properly secured.

    Conclusion

    Building your own cold frame is a rewarding experience that can significantly extend your gardening season. With a little planning and effort, you can create a valuable asset for your garden, allowing you to start seeds earlier, protect plants during the colder months, and enjoy a bountiful harvest year-round.

    Share:

    Sleek and Simple Bedside Cabinets You Can Build

    Sleek and Simple Bedside Cabinets You Can Build

    Sleek and Simple Bedside Cabinets You Can Build

    So, you've got a new bed, and you're ready to create the perfect cozy reading nook. But what about those bedside tables? Store-bought options can be pricey, and finding the perfect style and size can be a real struggle.

    Don't worry! Building your own bedside cabinets is easier than you might think. You can create sleek and simple designs that perfectly match your bedroom decor, and with a little bit of DIY spirit, you can have unique, personalized furniture that reflects your style.

    Here are some simple yet stylish bedside cabinet designs you can tackle yourself, with detailed instructions for each step. Let's get building!

    Minimalist Modern Nightstand

    This minimalist nightstand is perfect for a contemporary bedroom, featuring clean lines and a sleek, simple design. It's easy to build, even for beginners, and you can customize the wood type and finish to match your decor.

    Materials You’ll Need

    • Four 1x12 boards (for the sides and shelves)
    • Two 1x12 boards (for the top and bottom)
    • Wood glue
    • Wood screws
    • Wood stain or paint (optional)
    • Sandpaper (various grits)
    • Finishing oil or sealant (optional)
    • Measuring tape
    • Circular saw or miter saw
    • Drill
    • Clamps

    Instructions

    1. Cut your boards: Start by cutting the boards to size. For the sides, you'll need two pieces that are 16 inches high and 12 inches wide. For the shelves, you'll need two pieces that are 12 inches long and 11 inches wide. For the top and bottom, you'll need two pieces that are 16 inches long and 12 inches wide.
    2. Assemble the sides: Using wood glue and screws, attach the two side pieces to the top and bottom pieces. Make sure the sides are flush with the edges of the top and bottom pieces. Clamp the pieces together while the glue dries.
    3. Add the shelves: Once the sides are attached, use wood glue and screws to attach the two shelf pieces inside the cabinet, spaced evenly between the top and bottom.
    4. Sand and finish: Once the glue has dried, sand the cabinet smooth with fine-grit sandpaper. You can then stain or paint the cabinet, or leave it natural. If you choose to stain or paint, apply a finishing oil or sealant to protect the wood.

    Rustic Floating Nightstand

    This rustic floating nightstand gives off a cozy and farmhouse vibe, perfect for a bedroom with a more relaxed aesthetic. It's a great way to add some character and functionality to your space without taking up too much floor area.

    Materials You’ll Need

    • One 1x12 board (for the shelf)
    • Two 2x4 boards (for the supports)
    • Wood glue
    • Wood screws
    • Wood stain or paint (optional)
    • Sandpaper (various grits)
    • Finishing oil or sealant (optional)
    • Measuring tape
    • Circular saw or miter saw
    • Drill
    • Clamps

    Instructions

    1. Cut your boards: Cut the 1x12 board to the desired length for your shelf. For the supports, cut two pieces of the 2x4 board to the height you want the shelf to be off the ground. Make sure to factor in the thickness of the shelf.
    2. Attach the supports: Mark the locations on the wall where you want to attach the supports. Using a level, ensure the supports are plumb and even before drilling pilot holes. Attach the supports to the wall using appropriate wall anchors.
    3. Attach the shelf: Once the supports are securely attached, place the shelf on top of the supports. Using wood glue and screws, attach the shelf to the supports. Ensure the screws are long enough to reach through the shelf and into the supports.
    4. Sand and finish: Sand the shelf and supports smooth with fine-grit sandpaper. You can then stain or paint the shelf to match your bedroom decor. If you choose to stain or paint, apply a finishing oil or sealant to protect the wood.

    Industrial Pipe Nightstand

    This industrial pipe nightstand is a unique and modern addition to your bedroom. It's a great way to add a touch of industrial chic and functionality to your space.

    Materials You’ll Need

    • Four 1/2 inch black iron pipe fittings (for the legs)
    • One 1/2 inch black iron pipe fitting (for the top support)
    • Three 1/2 inch black iron pipes (for the legs)
    • One 1/2 inch black iron pipe (for the top support)
    • One 1/2 inch black iron pipe cap
    • One 1/2 inch black iron pipe tee
    • One 1x12 board (for the top)
    • Wood glue
    • Wood screws
    • Wood stain or paint (optional)
    • Sandpaper (various grits)
    • Finishing oil or sealant (optional)
    • Measuring tape
    • Circular saw or miter saw
    • Drill
    • Pipe wrench
    • Clamps

    Instructions

    1. Cut your boards: Cut the 1x12 board to the desired length and width for your top. You can choose a square or rectangular shape depending on your preferences.
    2. Assemble the pipe frame: Screw the four pipe fittings into the bottom of the 1x12 board. Ensure the fittings are evenly spaced and secure. Using the pipe wrench, attach the three pipes to the fittings, making sure they are snug and secure. Connect the fourth pipe to the top support fitting, extending it to create a horizontal support bar across the top of the frame.
    3. Attach the top: Once the pipe frame is assembled, attach the 1x12 top to the frame using wood glue and screws. Secure the top evenly and carefully.
    4. Sand and finish: Sand the top smooth with fine-grit sandpaper. You can then stain or paint the top to match your bedroom decor. If you choose to stain or paint, apply a finishing oil or sealant to protect the wood.

    Remember, these are just a few ideas to get you started. You can adjust the dimensions, wood types, and finishes to suit your individual needs and style. With a little creativity and some basic DIY skills, you can create a beautiful and functional bedside cabinet that you'll love for years to come.

    Happy building!

    Share:

    How to create a custom wooden clock thatÂ’s affordable

    How to create a custom wooden clock that’s affordable

    Crafting an Affordable Custom Wooden Clock

    A clock is more than just a timekeeping device. It can be a statement piece, a focal point in a room, and a reflection of your personal style. While purchasing a ready-made clock might seem like the easiest option, crafting a custom wooden clock offers a unique opportunity to express your creativity and create a truly personalized piece. The best part? You don't need to break the bank to do it. This guide will walk you through the process of creating your own custom wooden clock, from concept to completion, while keeping it affordable.

    Conceptualizing Your Clock

    The first step in any creative endeavor is to visualize the final product. This is where your imagination and personal style come into play. Consider the following aspects:

    Design and Shape

    • Classic Round or Square: These shapes are timeless and offer a clean aesthetic, making them easy to integrate into any decor.
    • Geometric Shapes: Triangle, hexagon, or even a star shape can add a modern touch and create a conversation piece.
    • Organic Forms: Consider using naturally curved wood or crafting a clock with irregular edges to create a more rustic or natural feel.

    Size and Proportion

    Think about the space where the clock will be placed and choose a size that complements it. A small clock for a bedside table might be perfect, while a large clock could act as a statement piece on a wall.

    Materials

    • Wood Type: Choose a wood that aligns with your design and budget. Softwoods like pine or cedar are readily available and affordable. Hardwoods like oak or cherry offer durability and a richer look.
    • Clock Movement: A quartz movement is a reliable and affordable option. You can find them at most craft stores or online retailers.
    • Hands: Select hands that complement the style and size of your clock. You can find a wide variety of styles and materials.

    Color and Finish

    Choose a color scheme that blends with your home's interior or creates a striking contrast. Natural wood finishes can be elegant, while paints or stains offer endless customization options. Consider adding a sealant for protection and durability.

    Gathering Supplies and Tools

    Once you have a clear vision for your clock, it's time to gather the necessary supplies and tools. This will ensure a smooth and efficient crafting process.

    Wood

    • Consider salvaged or reclaimed wood: This can be a budget-friendly option and add a unique character to your clock. Look for old pallets, furniture, or even leftover scraps from other projects.
    • Purchase wood from a local lumberyard: This offers greater flexibility in choosing wood types, dimensions, and quality. You can often find good deals on smaller pieces that are perfect for clock projects.

    Tools

    • Saw: A jigsaw, circular saw, or handsaw will be needed to cut the wood to size. If you don't own these, you might be able to borrow them from a friend or rent them from a tool rental store.
    • Sandpaper: You'll need various grits of sandpaper to smooth out the wood and prepare it for finishing.
    • Drill: A drill is essential for creating holes for the clock movement and hands.
    • Clamps: Clamps are useful for holding pieces of wood together while gluing or securing them.
    • Measuring Tape, Pencil, and Ruler: These are essential for accurate measurements and transferring your design to the wood.

    Other Supplies

    • Clock Movement: Choose a quartz movement based on your clock's size and design. You can often find them in kits that include hands and mounting hardware.
    • Wood Glue: A strong wood glue is essential for securely joining the wood pieces.
    • Finishing Supplies: This includes paint, stain, sealant, and brushes. Choose finishes that complement the style and wood type of your clock.

    Creating Your Clock

    Now that you have all the necessary supplies, it's time to bring your clock to life. This section will guide you through the key steps involved in crafting your unique wooden clock.

    Cutting the Wood

    Begin by cutting the wood to size based on your design and measurements. Use a saw that is appropriate for the thickness of the wood and follow safety precautions. Take your time and make sure your cuts are precise and clean. If you're using salvaged wood, you may need to cut away any damaged or warped sections.

    Sanding

    Sand the edges and surfaces of the wood to create a smooth finish. Start with coarser grit sandpaper and progressively move to finer grits to achieve a smooth, even surface. Pay extra attention to the edges and corners. This step is essential for a professional-looking clock and helps to prevent splinters.

    Assembly

    If your design involves multiple pieces of wood, assemble them using wood glue. Clamp the pieces together securely and allow the glue to dry completely. Follow the manufacturer's instructions for drying time and ensure the glue has set properly before proceeding to the next steps.

    Clock Movement Installation

    Locate the center of the clock face and drill a pilot hole for the clock movement. Ensure the hole is the appropriate size for the movement's shaft. Secure the movement to the back of the clock face using the provided hardware. Test the movement to make sure it's functioning properly before proceeding.

    Hand Installation

    Attach the hands to the clock movement according to the provided instructions. You may need to use a small screwdriver to tighten the screws that secure the hands to the movement shaft. Ensure the hands are installed correctly and are balanced, preventing any ticking or rattling.

    Finishing

    Apply the chosen finish to the clock. This could involve painting, staining, or applying a sealant. Let the finish dry completely before hanging your clock. If you're using paint or stain, apply multiple thin coats rather than one thick coat to ensure even coverage.

    Hanging the Clock

    Locate the desired spot for your clock and mark the wall for hanging. Choose a suitable hook or hanger that can support the weight of your clock. Hang the clock securely and ensure it is level. Admire your handmade creation and enjoy your personalized wooden clock!

    Tips for Affordability

    Creating a custom wooden clock doesn't have to be expensive. Here are some tips to keep costs down:

    • Shop for deals: Look for sales and discounts on wood, clock movements, and finishing supplies. Many craft stores and online retailers offer regular sales and clearances.
    • Repurpose materials: Use salvaged or reclaimed wood to give your clock a unique character and save money. Old pallets, furniture, or even leftover scraps from other projects can be repurposed into beautiful clock faces.
    • Get creative with finishing: Instead of expensive paints and stains, consider using natural wood finishes, chalk paint, or even decoupage techniques to create a unique look.
    • Don't be afraid to try something new: Experiment with different techniques and materials to create your own unique clock design. This can be both fun and budget-friendly.

    Conclusion

    Crafting a custom wooden clock is a rewarding project that allows you to express your creativity and add a unique touch to your home decor. By following these steps and incorporating the tips for affordability, you can create a beautiful and functional clock that is both unique and budget-friendly. So, gather your supplies, unleash your creativity, and enjoy the journey of crafting your own custom wooden clock!

    Share:

    Popular Posts

    Search This Blog

    Powered by Blogger.

    Blog Archive

    Blog Archive

    Recent Posts

    Theme Support